Xiaomi Mi Router 3C
Design & Features
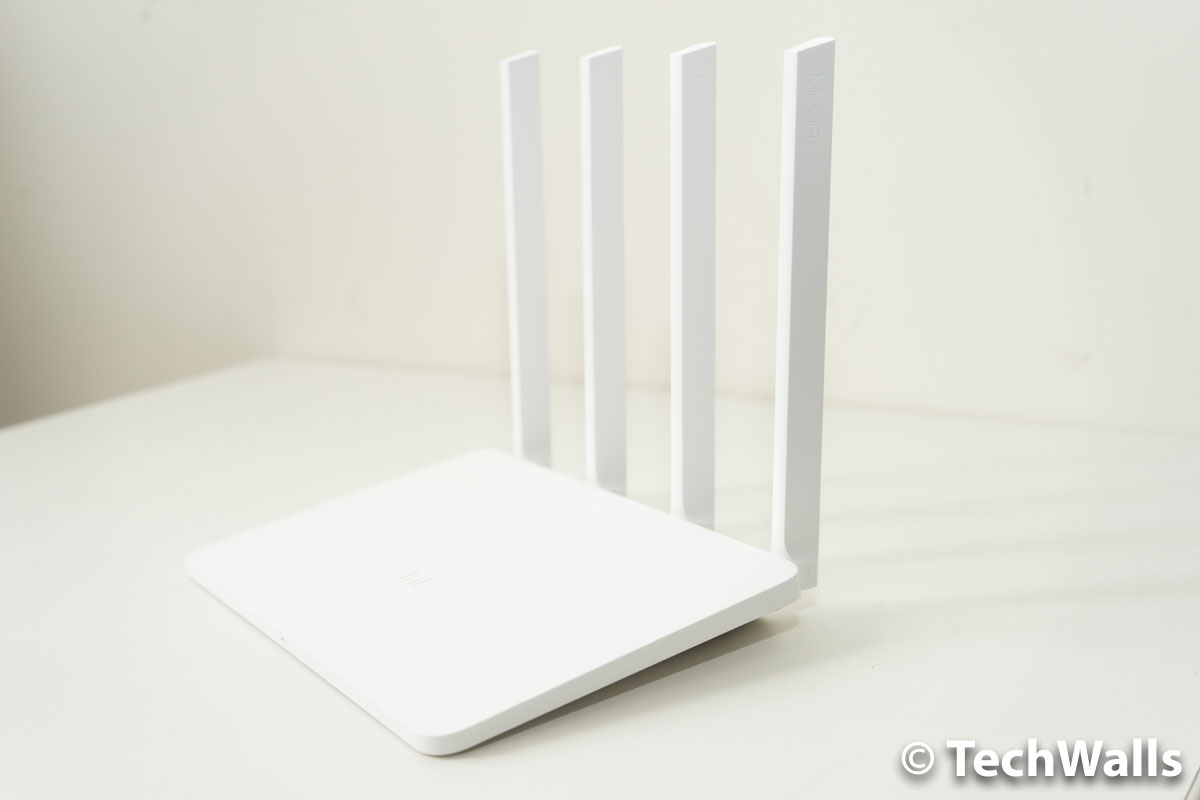
Similar to other Xiaomi’s smart products, the Mi router features a minimalist design in a white exterior. The whole product is still made of plastic but it feels quite sturdy. I was also quite surprised when I took it out of the box, the router is extremely lightweight as there is only a mainboard inside the plastic body. It is super thin and there is no button at all.
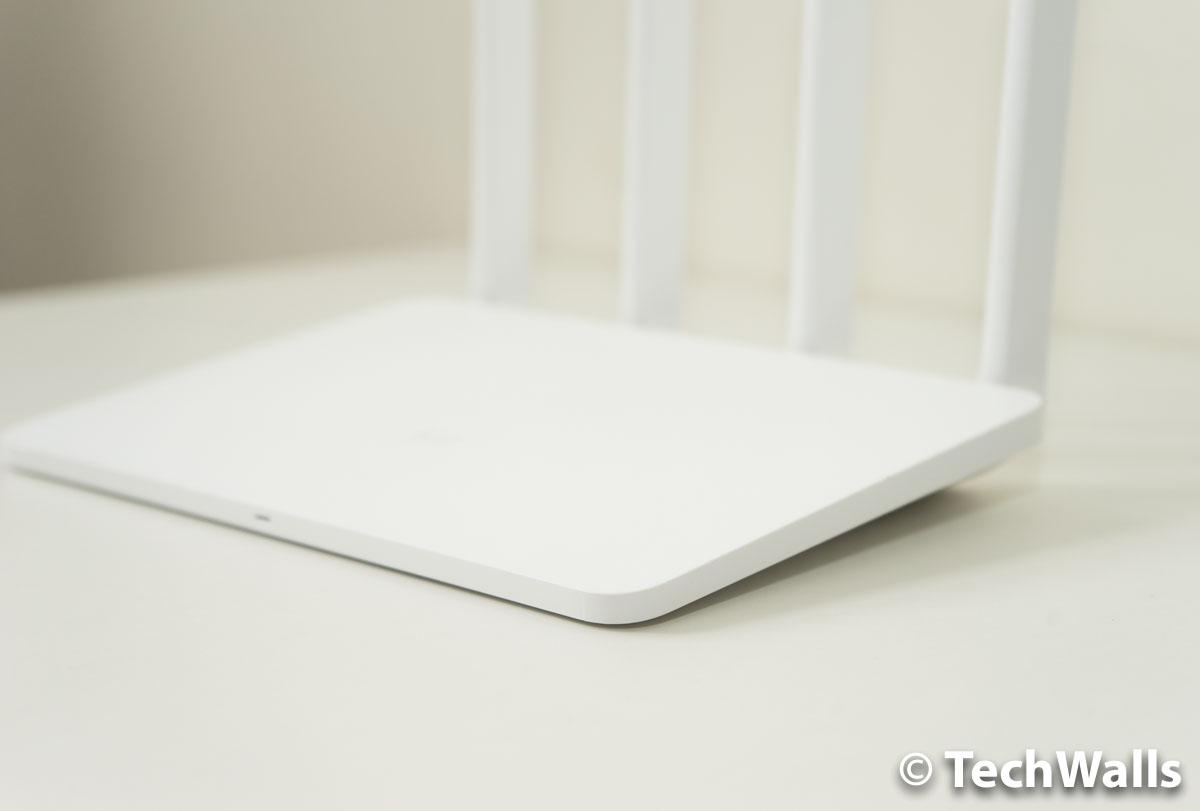
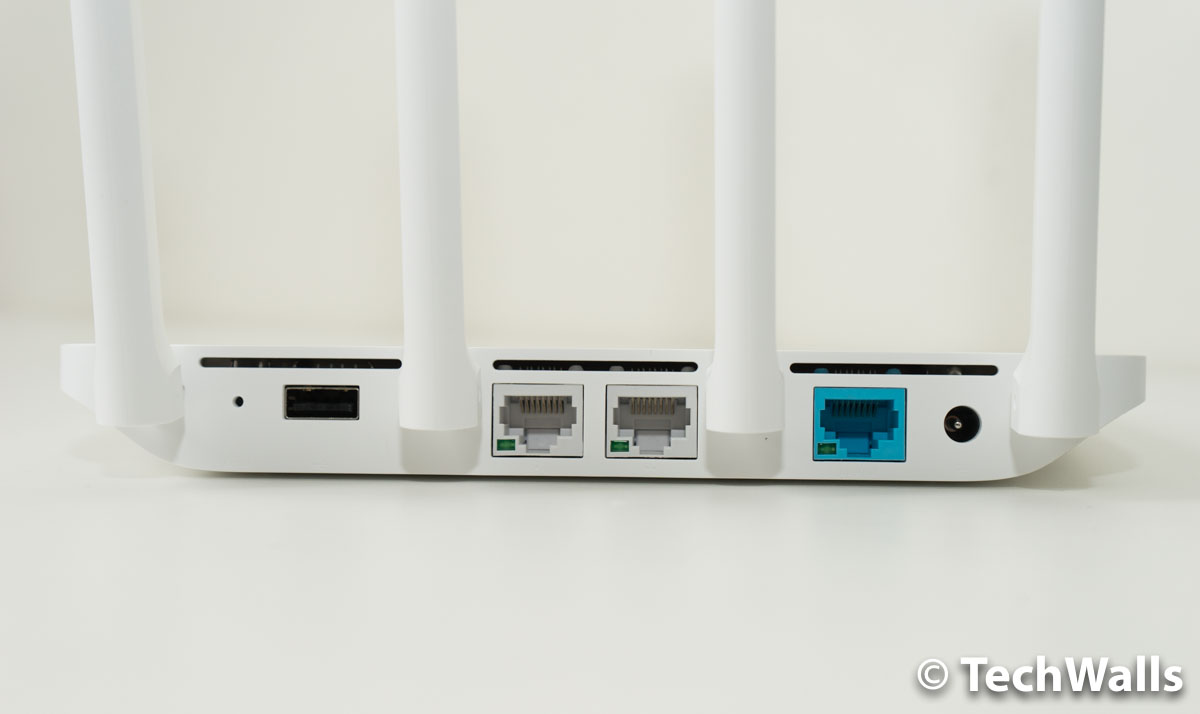
You just can find some ports on the back of the unit, including 2 LAN ports, 1 WAN port, a power port and a USB 2.0 port.
The router is equipped with 4 external antennas to deliver a wider coverage, we will take a deeper look at the performance in the next section.
The router doesn’t have a power button, so you just need to plug in the power adapter and connect to your modem, then everything is ready. You now can connect your smartphone or computer to the new Xiaomi network to set up the router. The process is quite easy but the web interface is in Chinese, so you will have to take a guess sometimes.
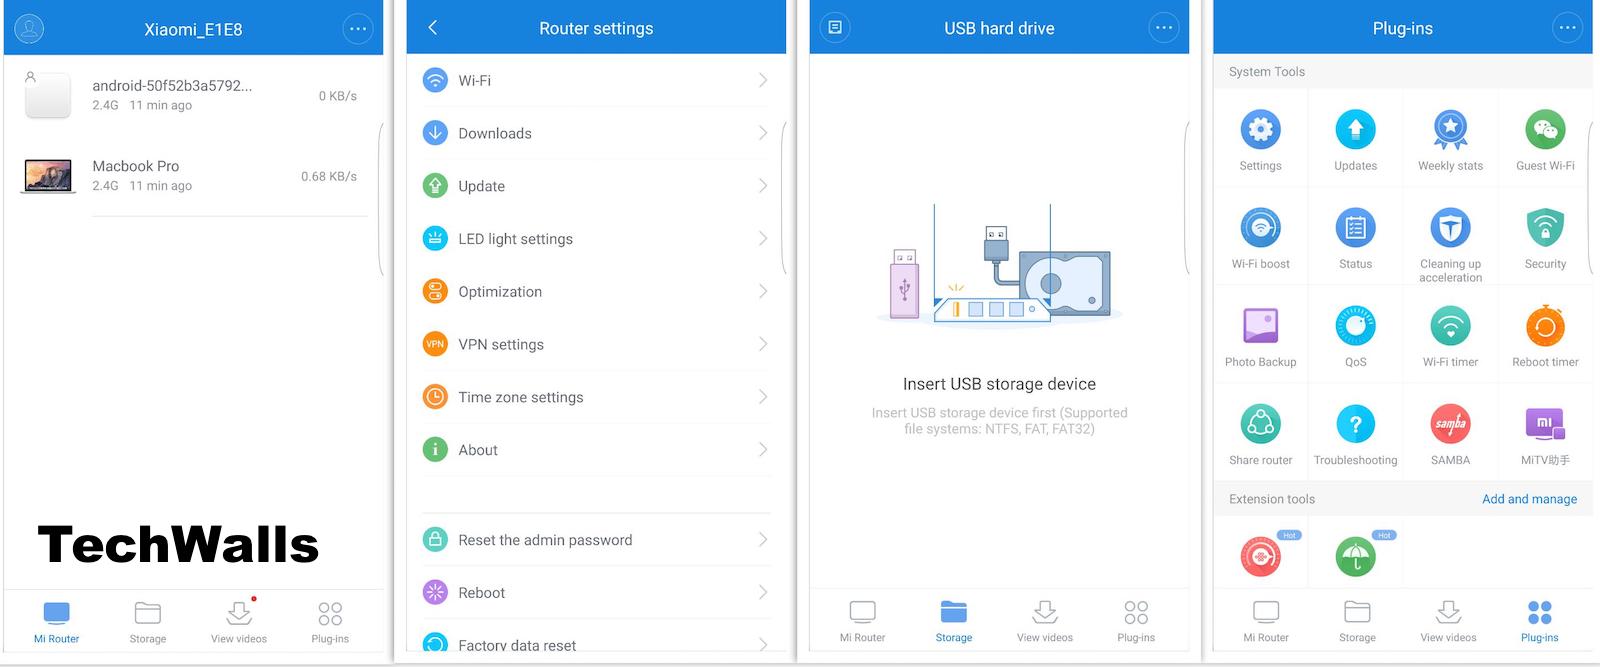
There is a companion app called MiWiFi and it is available in English. However, I don’t find the app useful at all, the web interface is simpler and has advanced network settings. I also hate that the app is too complicated and it requires a lot of permissions when I install it on my Android phone. Take a look at some screenshots from the app.
Performance
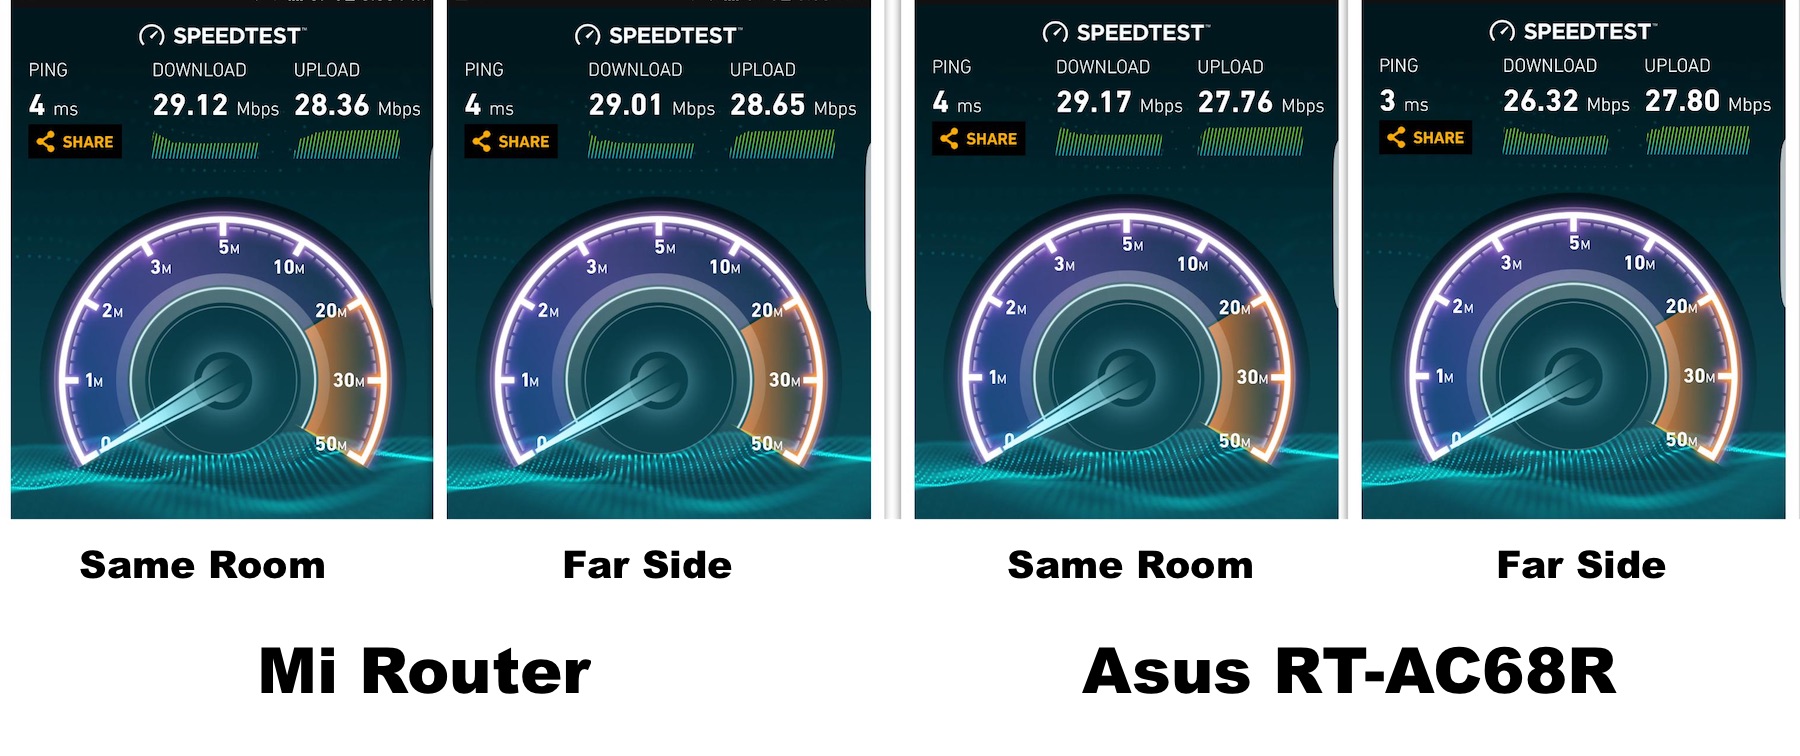
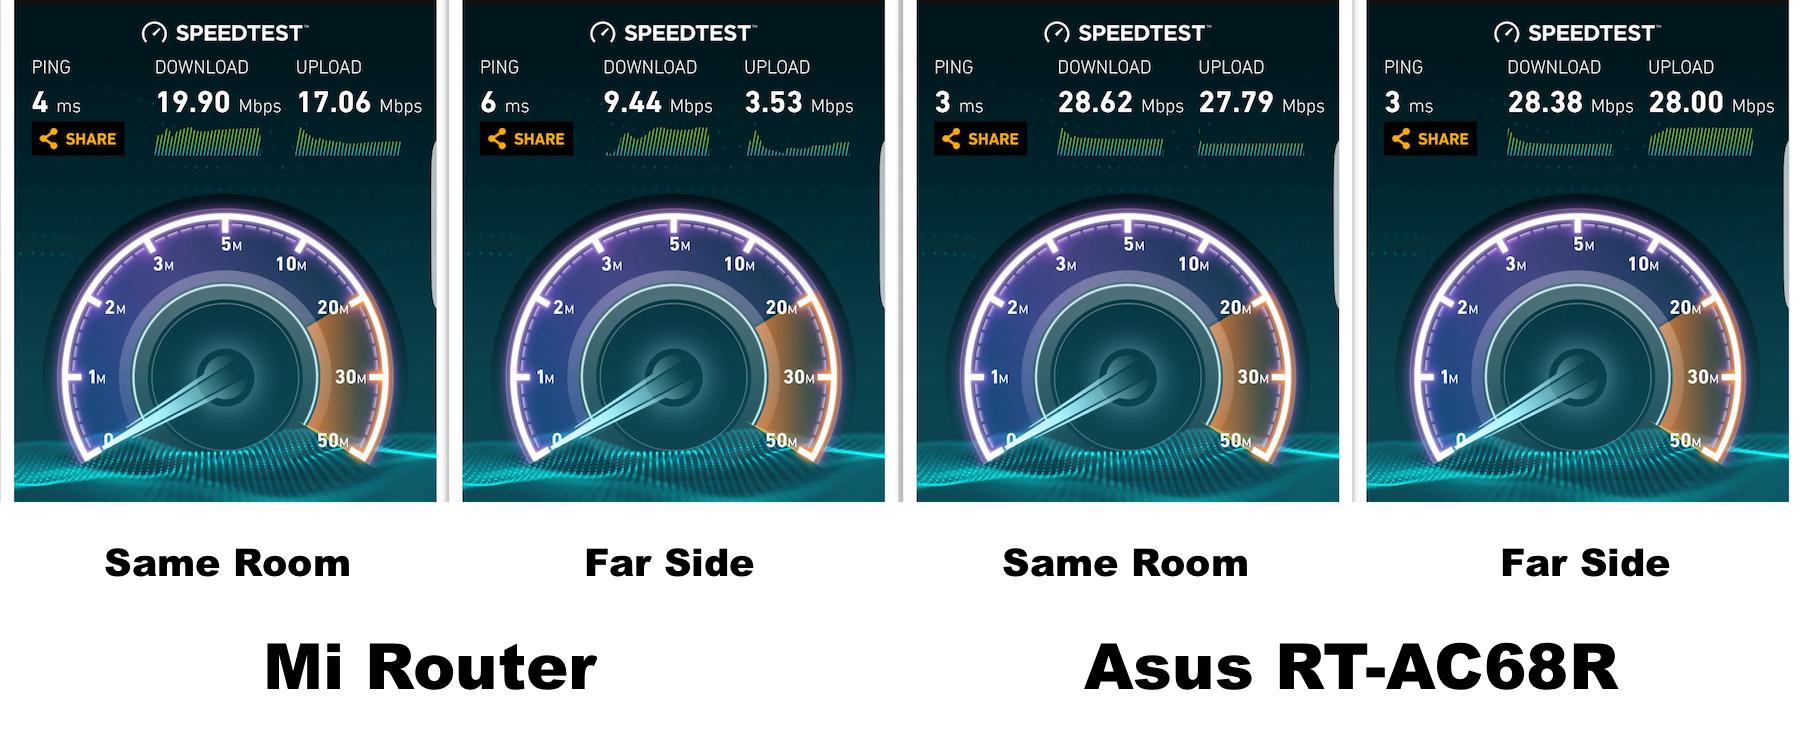
The Mi WiFi Router 3 is a dual-band 802.11ac router that can operate on both the 2.4GHz and 5GHz bands. I made a speed comparison between this router and my current router, which is the Asus RT-AC68R. I tested them using my smartphone in the same room as well in the furthest room of my house. Let’s check out the results.
Speed Test on 2.4GHz band
Mi WiFi Router 3 (left) vs Asus RT-AC68R (right)
Speed Test on 5GHz band
Mi WiFi Router 3 (left) vs Asus RT-AC68R (right)
You can see that the performances of these 2 routers are quite similar on the 2.4GHz band. The Xiaomi’s router did a great job and I had no problem connecting to the Internet in the weakest Wi-Fi spots in my house. My computer and my smartphone always receive a very good signal from the router.
However, the performance on the 5GHz band is another story. The Internet speed with the Mi router is significantly slower when I’m far away, and sometimes I even couldn’t watch a Youtube video in full-HD resolution. Of course, the connection is still great when I’m in close proximity to the router. On the other hand, the Asus router performs consistently and I have great coverage all over my house.
Conclusion
Pros
- Cheap
- Futuristic design
- Great performance on 2.4GHz band
![[Image: ScreenHunter_205-Aug.-07-00.51.jpg]](https://blog.hovatek.com/bpyeki/uploads/2017/08/ScreenHunter_205-Aug.-07-00.51.jpg)
![[Image: create-a-bootable-SD-card-from-the-mmcbl...ager-1.jpg]](https://blog.hovatek.com/bpyeki/uploads/2017/08/create-a-bootable-SD-card-from-the-mmcblk0.img-using-Win32DiskImager-1.jpg)
![[Image: create-a-bootable-SD-card-from-the-mmcbl...ager-2.jpg]](https://blog.hovatek.com/bpyeki/uploads/2017/08/create-a-bootable-SD-card-from-the-mmcblk0.img-using-Win32DiskImager-2.jpg)
![[Image: create-a-bootable-SD-card-from-the-mmcbl...ager-3.jpg]](https://blog.hovatek.com/bpyeki/uploads/2017/08/create-a-bootable-SD-card-from-the-mmcblk0.img-using-Win32DiskImager-3.jpg)
![[Image: create-a-bootable-SD-card-from-the-mmcbl...ager-4.jpg]](https://blog.hovatek.com/bpyeki/uploads/2017/08/create-a-bootable-SD-card-from-the-mmcblk0.img-using-Win32DiskImager-4.jpg)
![[Image: create-a-bootable-SD-card-from-the-mmcbl...ager-5.jpg]](https://blog.hovatek.com/bpyeki/uploads/2017/08/create-a-bootable-SD-card-from-the-mmcblk0.img-using-Win32DiskImager-5.jpg)
![[Image: create-a-bootable-SD-card-from-the-mmcbl...ager-6.jpg]](https://blog.hovatek.com/bpyeki/uploads/2017/08/create-a-bootable-SD-card-from-the-mmcblk0.img-using-Win32DiskImager-6.jpg)
![[Image: create-a-bootable-SD-card-from-the-mmcbl...ager-7.jpg]](https://blog.hovatek.com/bpyeki/uploads/2017/08/create-a-bootable-SD-card-from-the-mmcblk0.img-using-Win32DiskImager-7.jpg)
![[Image: create-a-bootable-SD-card-from-the-mmcbl...ager-8.jpg]](https://blog.hovatek.com/bpyeki/uploads/2017/08/create-a-bootable-SD-card-from-the-mmcblk0.img-using-Win32DiskImager-8.jpg)
![[Image: Hovatek-HTC-in-HBoot.jpg]](https://blog.hovatek.com/bpyeki/uploads/2017/08/Hovatek-HTC-in-HBoot.jpg)